Plate compactor hire is a small cost that decides whether a patio, path or driveway stays flat for years or sinks in the first winter. The right plate depends on what you’re compacting and how deep the layers are.

In this guide
We hire the full Weber MT range from our depot near Okehampton: three forward plates (CF 1, CF 2 and CF 3), three reversible plates (CR 2, CR 3 and CR 7) and the VPR 450 paving roller for block paving. This guide explains how to choose between them, how to compact a sub-base properly, and how to plan plate compactor hire around a real patio or driveway job.
How a plate compactor actually works
Inside the base plate is an exciter: a rotating shaft with off-centre weights, driven by the engine through a belt and clutch. As it spins, it makes the plate vibrate rapidly, many times a second. Each vibration shakes the particles of stone or sand so they shuffle into the gaps between each other, while the weight of the plate presses them down. The result is a denser, firmer layer with fewer air voids, which is what stops a surface sinking later.
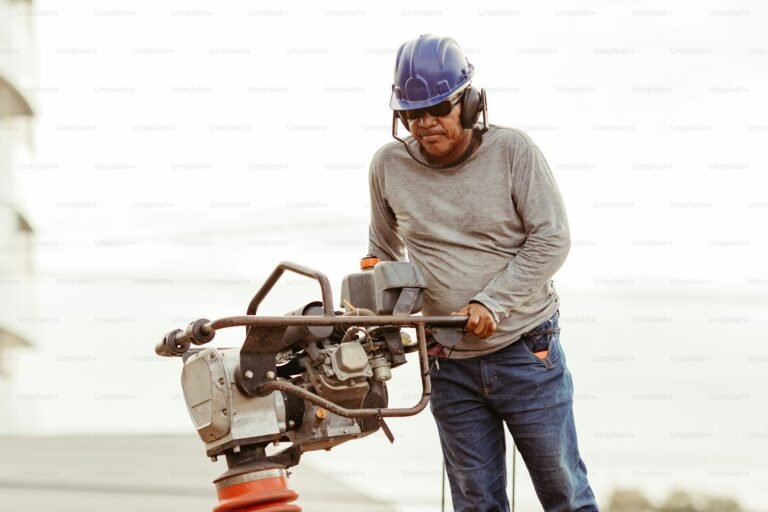
That is also why plates work best on granular materials, such as Type 1 sub-base, crushed stone, gravel and sand, which can move and lock together. Sticky clay doesn’t behave the same way: it tends to absorb the vibration and squeeze sideways. For cohesive soils in narrow trenches, a rammer with its hammering action is usually the better tool.
The heavier the plate and the stronger the exciter, the deeper the effect reaches. That is the real difference between a light forward plate for a garden path and a heavy reversible plate for a yard base.
Forward plates vs reversible plates
A forward plate travels in one direction only. You walk behind it and turn it at the end of each run. Forward plates are lighter, easy to handle and ideal for sub-base, paths, patios and block paving on open areas.
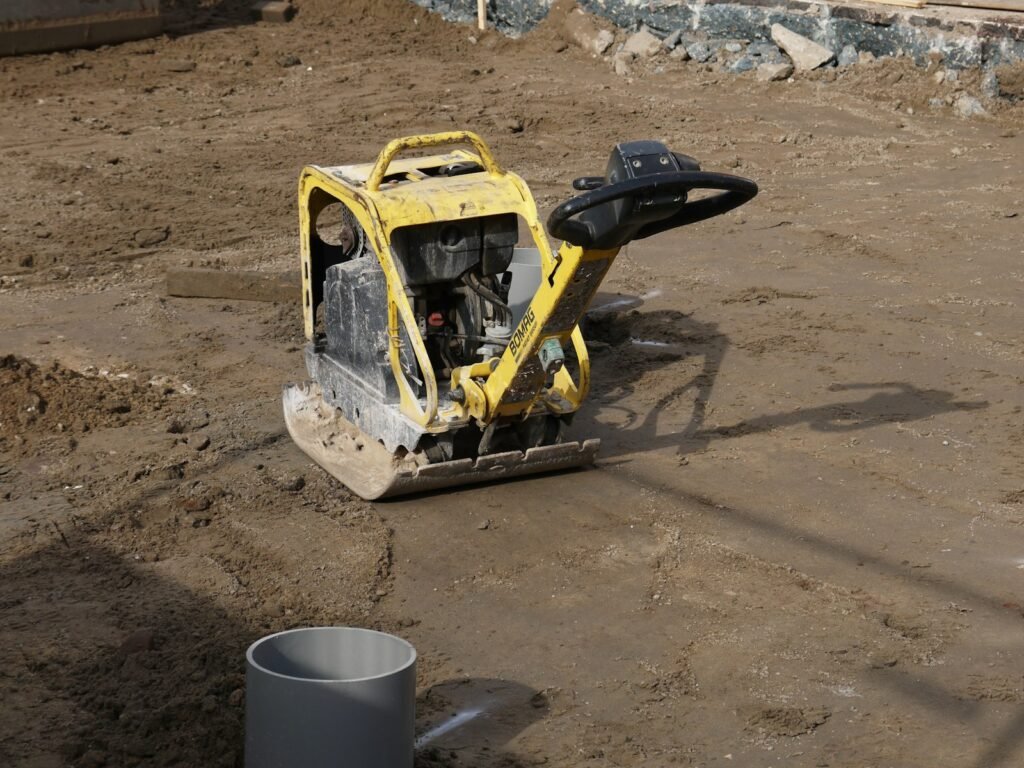
A reversible plate can travel forwards and backwards, and on most models be held in one spot to work a particular area. Reversible plates are generally heavier and deliver more compaction force, so they handle deeper layers, trench backfill and areas where you can’t turn a machine round, such as against a wall or in a trench.
Working technique
With a forward plate, work in straight runs, turning at the end of each and overlapping the previous pass by a third or so. Let the machine pull itself along rather than pushing it. With a reversible plate, you can work up to a wall or into a corner and back out without turning, which makes it much easier in confined areas and trench bottoms. On slopes, work up and down rather than across, and take care on the steeper sections where the plate will want to run away downhill.
Choosing the right Weber plate
| Machine | Type | Best for |
|---|---|---|
| Weber MT CF 1-III Hd | Forward plate, light duty | Garden paths, small patios, bedding sand, light sub-base |
| Weber MT CF 2-II Hd | Forward plate, mid-range | Paths and driveways, patios, general sub-base |
| Weber MT CF 3-II Hd | Forward plate, heavy duty | Sub-base compaction on larger drives and hardstandings |
| Weber MT CR 2 | Reversible plate | Backfill and trench work |
| Weber MT CR 3-III | Reversible plate | Road sub-base and utility reinstatement |
| Weber MT CR 7 | Reversible plate | Large area compaction, deeper layers |
| Weber MT VPR 450 | Paving stone roller | Consolidating block paving and pavers |
As a rule of thumb: for a garden patio, the CF 1 or CF 2 is usually enough. For a domestic driveway sub-base, the CF 2 or CF 3. For larger hardstandings, yard bases or deeper fill, step up to a reversible plate. If you’re laying block paving, add the VPR 450 or use a plate with a protective paving pad for the final compaction. All of these are on our construction hire page.
How to compact a sub-base properly
Most failed patios and drives fail from below. A well-compacted sub-base spreads the load and resists frost and water. The basic method:
- Dig to formation level. Remove topsoil and soft material. Compact the formation itself before adding stone.
- Lay a membrane if needed. A geotextile helps on soft or clay ground, which is common across Devon.
- Spread sub-base in layers. Don’t tip the full depth in one go. Lighter plates are only effective on thin layers, often around 75mm to 100mm; heavier reversible plates can handle more. Check the manufacturer’s guidance for the plate you hire.
- Get the moisture right. Sub-base compacts best when slightly damp. Bone-dry stone won’t lock together, and saturated stone pumps and moves.
- Make several passes. Overlap each run and keep going until the plate stops leaving marks and the surface feels firm underfoot.
- Check levels and falls. Build in the fall away from buildings as you go, rather than trying to fix it in the bedding layer.
Your sub-base depth depends on the use, the ground and the surface you’re laying. A driveway that takes cars needs more than a garden patio. Follow the paving manufacturer’s specification or your designer’s drawings.
Plate compactor hire for patios and drives
Patios with slabs
Use the plate on the sub-base only. Natural stone and porcelain slabs laid on a mortar bed should be tapped down with a rubber mallet, not compacted with a vibrating plate, which can crack slabs and disturb the bed.
Block paving drives
Block paving is the exception: after laying blocks on a screeded sand bed, the whole area is compacted to bed the blocks in, then jointing sand is brushed in and the surface compacted again. Use the VPR 450 paving roller or a plate fitted with a paving pad, so the blocks aren’t scuffed or chipped.
Gravel drives and paths
Compact the sub-base thoroughly, then lay the gravel. A light pass over some decorative stones can help settle them, but many gravels don’t need compacting at all.
Shed, cabin and greenhouse bases
Garden buildings need a firm, level base or they rack and doors stop closing. Whether you finish with slabs, a concrete slab or a plastic grid system, the stone underneath should be compacted in thin layers with a light or mid-range forward plate. Check level in both directions as you go, as a few millimetres out over a long building shows up quickly.
Artificial grass bases
Artificial grass is only as smooth as the base under it. A compacted sub-base, followed by a thin layer of fine aggregate or sharp sand that is screeded and compacted again, gives a firm, even surface that drains. A light plate is usually ideal, with extra passes along edges where the grass will be fixed.
Two worked examples
These are illustrations to help you plan, not specifications. Always follow the paving manufacturer’s guidance or your designer’s drawings for depths and materials.
A 30 square metre garden patio
- Day 1, morning: dig out turf and soil to the depth needed for sub-base, bedding and slabs, with a fall away from the house. Compact the formation with a CF 1 or CF 2.
- Day 1, afternoon: spread sub-base in two thin layers, compacting each one with several overlapping passes until the plate stops leaving marks.
- Day 2: lay slabs on a mortar bed, tapping each down with a rubber mallet. The plate isn’t used on the slabs.
A one or two-day plate compactor hire usually covers this, with the plate going back once the sub-base is done.
A block paved driveway
- Excavate to the specified depth for a driveway that takes cars, and compact the formation.
- Build the sub-base in layers with a CF 3 or a reversible plate, checking levels and falls as you go.
- Lay edge restraints and let any concrete haunching cure before compacting near them.
- Screed the sand bed and lay the blocks.
- Bed the blocks with the VPR 450 paving roller or a plate with a paving pad, brush in jointing sand, then compact again.
Here a weekly hire often makes sense, because the plate is used at the start and again at the end, with laying in between.
Common mistakes to avoid
- Laying 150mm or more of stone and expecting a light plate to compact it in one pass.
- Compacting wet clay. It just moves around. Wait for drier weather or improve the formation.
- Running a plate over block paving without a pad, leaving scuff marks on new blocks.
- Working too close to fresh walls, foundations or drainage runs with a heavy reversible plate.
- Forgetting to compact the edges. Use a smaller plate or a rammer along walls and kerbs.
Weather and ground in the South West
Much of Devon and Cornwall sits on clay or clay-rich ground that holds water through the winter. That matters for compaction in two ways. First, a soft, wet formation won’t give the sub-base a solid base, however well you compact the stone above it, so dig out soft spots and replace them with stone, and consider a geotextile. Second, sub-base itself compacts best slightly damp. After a dry spell in summer, a light spray from a hose can help the stone lock together; after a week of rain, let it drain before you start.
Frost is the other enemy. Don’t lay or compact on frozen ground, and don’t leave a freshly dug formation exposed to a hard frost and then build on it. In practice, spring to early autumn is the easiest time for patios and drives, though careful winter work is perfectly possible.
Glossary of compaction terms
- Formation: the dug-out ground at the bottom of the excavation, before any stone goes in.
- Sub-base: the load-bearing layer of crushed stone between the formation and the surface. Type 1 is a common graded sub-base material.
- Lift or layer: one spread of material compacted before the next goes on. Thin lifts compact properly; thick ones don’t.
- Bedding layer: the sand or mortar the slabs or blocks are laid on.
- Jointing sand: fine dry sand brushed into the gaps between blocks to lock them together.
- Paving pad: a protective mat fitted under the plate to stop it scuffing or chipping blocks.
- Haunching: concrete placed behind kerbs and edgings to hold them in place.
- Fall: the gentle slope built into a surface so water drains away from buildings.
- Geotextile: a permeable fabric laid on soft formation to stop sub-base sinking into it.
Collecting or delivering your plate
Plate compactors look small but are heavy, and the larger reversible plates are far too heavy to lift by hand. You can collect from our depot near Okehampton during opening hours if you have a suitable vehicle, a ramp and a way to strap the machine down securely.
Most customers find delivery easier, particularly when the plate is part of a bigger order with a mini digger or dumper. Lay the plate flat in transport and keep the fuel tap off so petrol doesn’t leak. On site, use a ramp or the lifting point with suitable equipment rather than two people struggling with it.
When you have finished, scrape any caked material off the base plate and wipe the machine down, as dirty equipment may be cleaned at your cost. Then call or WhatsApp us to off-hire. Hire charges run until you have an off-hire reference, so keep the plate secure and accessible until it is collected or returned.
Safe use and vibration
Vibrating plates expose the user to hand-arm vibration. The Control of Vibration at Work Regulations 2005 set a daily exposure action value of 2.5 m/s² A(8) and an exposure limit value of 5 m/s² A(8), so employers need to assess and manage how long people use vibrating tools.
The vibration level for a given plate is in its manual, and it is worth checking before planning a long day of compaction. Practical steps: share the work, take breaks, keep hands warm, and don’t grip the handle harder than you need to. Wear hearing protection, safety boots and eye protection, and keep fuel away from hot engines. Never leave a running plate unattended.
Plates are loud, and noise exposure builds up over a working day. HSE’s guidance on the Control of Noise at Work Regulations sets action values of 80 and 85 dB(A) for daily exposure, so hearing protection should be standard for anyone running or working near a plate. If you are working in a domestic street, let the neighbours know when the noisy days are and keep to sensible hours.
If you need smaller power tools alongside the plate, our hand tools range is growing. Ask us what’s available for your job.
Daily checks and looking after the plate
- Check the engine oil and fuel before starting, using the fuel stated in the operator’s manual.
- Look at the base plate for damage and clear any built-up material from underneath.
- Make sure the handle and its anti-vibration mounts are secure.
- Fit the paving pad correctly before working on blocks, and remove it for sub-base work.
- Don’t run the plate on concrete or tarmac for long, which hammers the machine without compacting anything.
- Switch off and let it cool before refuelling or loading it into a vehicle.
If something doesn’t sound or feel right, stop and call us rather than attempting a repair. We’ll assess it and arrange a repair or replacement.
Hire periods and what affects the cost
We don’t publish hire prices, so WhatsApp us for a current quote. What you pay depends on which plate you need, how long you need it, and whether it is collected or delivered. A plate compactor hire often makes most sense bundled with the other kit for the job, such as a mini excavator, tracked dumper or Altrad Belle mixer, so one delivery covers everything. For contractors who use compaction kit every week, Flex Hire Tier 1 (£795 +VAT and delivery per month) includes compaction plates, with swaps whenever the job changes and servicing included.
Frequently asked questions
Which plate compactor is best for a patio?
For most garden patios, a light or mid-range forward plate such as the Weber CF 1 or CF 2 is ideal for the sub-base.
Can I use a plate compactor on block paving?
Yes, with a protective paving pad fitted, or use a dedicated paving roller like the VPR 450.
Do I need a reversible plate for a driveway?
Not usually for a domestic drive. A heavier forward plate copes well. A reversible plate helps with deep layers, large areas or tight corners.
How long will I need it?
Many patio and path jobs need a day or two. Larger drives with several sub-base layers often suit a weekly hire.
How many passes does a sub-base need?
There’s no single number. Keep making overlapping passes until the plate stops leaving marks and the surface feels firm and solid underfoot, then add one more. Thin, damp layers need fewer passes than thick, dry ones.
Can I use a plate compactor on clay?
It will firm the surface, but plates are much less effective on sticky clay than on granular stone. For clay backfill in trenches, a rammer usually does a better job.
Do I need training to use a plate compactor?
Plates are simple to use, but the operator should be shown how to start, control and stop it, and understand vibration and noise risks. Our hire FAQs cover hirer responsibilities.
Book plate compactor hire
Tell us the job, the area in square metres and the layer depths, and we’ll match you to the right plate. WhatsApp or call 07841 036064 for a current quote, or use our contact page for written quotes.