If you’re working out how to lay block paving for a driveway or patio, the method comes down to six stages: plan the levels and drainage, dig out, build and compact a Type 1 sub-base, set edge restraints on concrete, screed a sharp sand laying course, then lay, cut, compact and joint the blocks. Each stage depends on the one before, so the work you can’t see decides how long the paving lasts.

In this guide
This guide covers the full method in the order you do it, with depths, laying patterns, the hire kit for each day and the mistakes that cause sinking, rutting and loose blocks. It is general information for domestic drives and patios in Devon, Cornwall, Somerset and Dorset.
Plan first: design, falls and drainage
Before you dig anything, work out where the water will go. Block paving sheds rain across its surface and into the joints, so the surface needs a fall and somewhere for the water to end up.
- Fall: a gradient of roughly 1 in 60 to 1 in 80 is common for drives and patios. That’s about 12 to 17mm per metre.
- Direction: always fall away from the house. Never towards the walls, garage door or a neighbour’s property.
- Damp-proof course: keep the finished surface well below the house damp-proof course, commonly 150mm below, unless a drainage channel is fitted against the wall.
- Where water ends up: a lawn, border, soakaway, channel drain or a permeable section of paving.
Mark finished levels on pegs or on the house wall with a chalk line before you start. A long straight edge and a spirit level work, but a laser level makes setting falls on a larger drive much easier.
Planning rules for front gardens and permeable paving
In England, the Planning Portal guidance on paving front gardens says that you don’t need planning permission for a new or replacement driveway of any size if it uses a permeable surface, such as permeable block paving, or if rainwater is directed to a lawn or border to drain naturally. Covering more than five square metres of a front garden with a traditional impermeable surface that drains to the road does need planning permission.
A dropped kerb is a separate matter and needs consent from the highway authority, which in Devon, Cornwall, Somerset and Dorset is the county or unitary council. Local rules and Article 4 Directions can also apply, and the rules above apply to houses, not flats. Check the current guidance with your council before you start.
Standard blocks with drainage, or permeable paving
Standard block paving on a sand bed sheds most water across the surface, so it needs a fall to a lawn, border, channel or soakaway. Permeable block paving lets water pass through wider joints into an open-graded sub-base that stores it and lets it soak away. Permeable systems use a different build-up: a clean, open-graded stone instead of Type 1 and a grit jointing material instead of kiln-dried sand. Follow the block manufacturer’s specification closely if you choose one.
Working out materials before you order
Ordering the right quantities is part of how to lay block paving without stoppages. Measure the area in square metres, then work out each material.
- Blocks: the area plus about 5 percent for a simple stretcher bond, or nearer 10 percent for herringbone and areas with lots of cuts.
- Type 1: area multiplied by compacted depth gives cubic metres. Type 1 is usually sold by the tonne, and suppliers will convert for you; allow extra because it compacts down.
- Sharp sand: area multiplied by about 0.05m for the loose laying course, plus a little spare.
- Kiln-dried sand: a few bags for a patio, more for a drive. Keep it dry until use.
- Kerbs and concrete: the edge length in metres, plus cement and ballast for beds and haunching.
Check where bulk bags will be dropped. If the lorry can only reach the front, you’ll be moving every tonne by dumper or barrow, which is where a tracked dumper earns its hire.
How deep to dig: build-ups for patios and driveways
Dig down to firm subsoil and remove all topsoil, roots and soft spots. The depth depends on what the paving will carry.
| Layer | Patio or path | Domestic driveway |
|---|---|---|
| Blocks | 50mm blocks | 50 to 60mm blocks, 60mm for regular car use is a common choice |
| Laying course (sharp sand) | About 30 to 40mm after compaction | About 30 to 40mm after compaction |
| Type 1 sub-base | About 100mm compacted | About 150mm compacted, more on soft clay |
| Typical total dig below finished level | Around 180 to 200mm | Around 230 to 250mm, deeper on poor ground |
These are typical figures, not a design. Soft clay, made ground or heavy vehicles need a deeper sub-base, and some ground benefits from a geotextile membrane under the Type 1 to stop it working into the soil. If in doubt, dig a trial hole and go deeper rather than shallower.
Dig to follow the finished fall so the sub-base is an even thickness all the way across. On a typical drive the dig produces a lot of spoil, so book a skip or muck-away before the digger arrives. A micro or mini digger, such as the Sunward SWE 08B or SWE 18UF on our construction equipment page, and a tracked dumper do this in a day where a spade would take a week.
Laying and compacting the Type 1 sub-base
The sub-base carries the load. Anyone learning how to lay block paving soon finds that most failures, ruts under tyres or dips at the edges, start here.
- Spread MOT Type 1 crushed stone in layers of about 75 to 100mm. Thicker layers don’t compact properly at depth.
- Rake each layer to the approximate fall.
- Compact with a plate compactor, several passes in overlapping lines and then crosswise. Slightly damp stone compacts best.
- Add the next layer and repeat until you reach sub-base level, which is finished level minus the block thickness and the laying course.
- Check levels with a string line or straight edge. High spots should be scraped off and low spots filled and re-compacted, not left for the sand to fix.
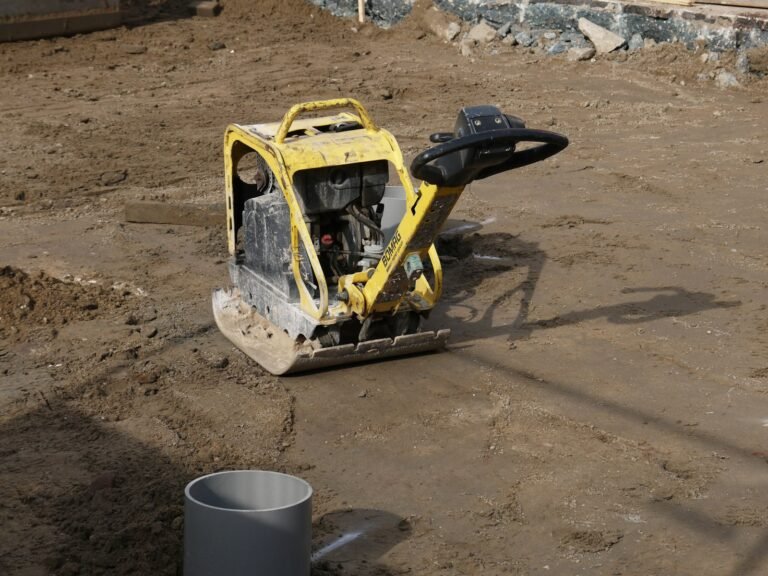
A Weber MT CF 2-II Hd forward plate suits most patios and drives. For thicker sub-bases on larger drives, the CF 3-II Hd heavy-duty plate or a CR 2 reversible plate gives more compaction per pass. Walk the finished sub-base: it should feel firm, with no movement underfoot.
Edge restraints: kerbs on concrete haunching
Block paving relies on the edges to hold everything tight. Without a solid edge restraint, the blocks creep outwards, joints open up and the paving loosens.
- Set edging kerbs or a soldier course of blocks on a concrete bed, typically around 100mm deep.
- Haunch the back of each kerb with concrete at about 45 degrees, up to around two thirds of its height, so it can’t be pushed outwards.
- Set edges to string lines at the correct level and fall.
- Where paving meets a house wall, a building or an existing solid edge, that edge can act as the restraint.
- Let the concrete set before you compact blocks against it.
A small mixer makes the concrete work much easier. The Altrad Belle Mini Mix 150 on our hand tools and mixers page is light enough to wheel round a house and handles kerb beds and haunching comfortably.
If you need a clean straight cut where new paving meets existing tarmac or concrete on your property, the Weber MT SM 82-3 pavement saw does it neatly. Cutting into a public road or footpath needs permission from the highway authority, so don’t cut there without it.
Screeding the sharp sand laying course
The laying course gives the blocks an even bed. It must be the right sand, the right depth and left undisturbed once screeded.
Which sand
Use sharp sand, also sold as grit sand or concreting sand. Don’t use soft building sand; it holds water and moves. The sand should be damp but not wet, holding together loosely when squeezed.
Screeding method
- Lay two screed rails, such as lengths of steel tube or straight timber, on the sub-base parallel to each other and set to the right height for the loose sand.
- Spread sand between them, slightly over-filling.
- Pull a straight edge across the rails to strike off a smooth, even layer.
- Remove the rails, fill the grooves with sand and trowel smooth.
- Only screed what you can lay that day, and keep the sand covered if rain threatens.
Allow for compaction. Loose sand drops by around 10mm or more when the blocks are compacted, so the blocks should sit a little proud of finished level before the plate goes over. Never walk on screeded sand. Kneel on boards or on blocks you’ve already laid.
How to lay block paving: patterns and laying technique
This is the satisfying part, but technique still matters. Here’s how to lay block paving so it stays tight and looks right.
Choosing a pattern
| Pattern | Best for | Notes |
|---|---|---|
| Herringbone (45 or 90 degrees) | Driveways and anywhere cars turn | Interlocks strongly and resists the turning forces from tyres; more cutting at the edges |
| Stretcher bond | Patios, paths and drives where traffic runs in one direction | Lay it across the direction of traffic on drives; simple and quick |
| Basketweave or parquet | Patios and paths | Decorative, but less interlock, so avoid it for vehicle areas |
Laying the blocks
- Start from a straight, fixed edge, usually a kerb or the house side, and set a string line to keep courses straight.
- Place each block straight down onto the sand. Don’t slide or press blocks into the sand.
- Keep joints tight and consistent, usually 2 to 5mm. Many blocks have spacer nibs to help.
- Work forwards across the area, kneeling on a board on the laid blocks, never on the sand.
- Draw blocks from several packs at once to mix colour variation evenly.
- Check the string line regularly and tap lines straight with a rubber mallet before compaction.
- Leave edge gaps for cut blocks until the main area is down.
Cutting blocks safely
Most block paving jobs need cut blocks along the edges, around manhole covers and at corners. Cut pieces smaller than about a third of a block are weak and tend to work loose, so plan cuts to avoid slivers. Adjust the layout or use a larger cut piece one block back.
Cutting concrete or clay blocks produces silica dust, which can cause serious lung disease. The HSE guidance on cutting paving blocks, kerbs and flags recommends a lower-energy method such as a block splitter where possible, cutting fewer blocks through good layout, and, where a cut-off saw is needed, using water suppression or on-tool extraction plus suitable respiratory protection such as an FFP3 mask.
Disc cutters and block splitters are among the items we’re adding to our hand tools range. Ask us what’s available and we’ll tell you or point you in the right direction.
Compacting the blocks and jointing with kiln-dried sand
Once the area is laid and the edges are cut in, the blocks need compacting into the laying course and locking together with jointing sand.
- Sweep the surface clean and dry. Any grit under the plate will scratch or chip the blocks.
- Compact with a plate compactor fitted with a rubber paving pad, or with a dedicated paving roller. Run two or three passes, working from the edges inwards.
- Replace any cracked blocks straight away.
- Brush dry kiln-dried sand over the surface into the joints.
- Compact again so the sand settles down into the joints, then brush in more sand and repeat until the joints are full.
- Leave a light layer of sand on the surface for a few days so rain and traffic work it down, then sweep off the surplus and top up as needed.
The Weber MT VPR 450 paving roller is built for consolidating pavers and block paving, with less risk of marking or chipping than a bare plate. If you’d rather use a plate, ask us about a paving pad to suit it. Only compact when the blocks and sand are dry, because damp jointing sand won’t run into the joints.
The hire kit list by day
Here’s an illustrative plan for a two-car block paved drive of around 40 square metres, to show what to hire and when. Your timings will vary with access, ground and weather.
- Day 1: Sunward SWE 18UF mini digger and tracked dumper delivered. Remove old surface, dig out to depth following the fall, load spoil to a skip or muck-away.
- Day 2: Type 1 delivered and spread in layers. CF 2-II Hd or CF 3-II Hd plate compactor in use. Digger and dumper can go back once the sub-base is in.
- Days 3 and 4: kerbs set on concrete and haunched with a Mini Mix 150 running on site. Leave to set.
- Days 5 to 7: screed sand and lay blocks in herringbone, cutting in edges last.
- Day 8: compact blocks with the VPR 450 paving roller, brush in kiln-dried sand, compact again and top up.
- End of hire: Brendon 35KPE power washer to clean down tools and paths before kit goes back.
Weekly hire is our most popular period and suits this kind of job. If you have several projects lined up, our Flex Hire plans let you swap kit for one flat monthly fee, with Tier 1 for compact kit and everyday tools at £795 +VAT and delivery per month and Tier 2, which adds crushers and excavators, at £895.
Common mistakes: how to lay block paving that lasts
- Thin or poorly compacted sub-base: the main cause of ruts and dips. Don’t save money here.
- Using the sand to correct levels: a laying course thicker in some places settles unevenly. Get the sub-base right first.
- Building sand instead of sharp sand: soft sand holds water and moves.
- Walking on screeded sand: footprints become dips in the finished paving.
- Weak edges: kerbs without concrete haunching let the paving spread.
- Small cut pieces: slivers along edges crack and work loose.
- Compacting on a dirty surface: grit under the plate scratches and chips blocks.
- Jointing with damp sand: it won’t fill the joints, so blocks rock.
- Falls towards the house: water pools against the wall and can cause damp.
Weather and ground in the South West
Wet weather is the biggest hold-up for block paving in Devon and Cornwall. Sharp sand that gets saturated after screeding should be lifted and re-laid once it dries, and jointing needs a dry day. Clay sub-soils hold water, so on clay sites a geotextile under the sub-base and a little more Type 1 are worth considering. Coastal sites dry quickly in wind, which helps jointing but can blow sand off the surface. Plan the laying and jointing days around the forecast, and keep materials covered.
Frequently asked questions
How deep should I dig for a block paving driveway?
For a typical domestic drive, around 230 to 250mm below finished level is common, allowing roughly 150mm of compacted Type 1, a 30 to 40mm sand course and 50 to 60mm blocks. Soft ground needs more.
Can I lay block paving straight onto soil or sand?
No. Without a compacted Type 1 sub-base the paving will sink and rut, especially under car tyres. The sub-base is the most important layer.
What is the best pattern for a driveway?
Herringbone at 45 or 90 degrees is the usual choice for drives because it interlocks strongly and resists the turning forces from tyres.
Do I need a plate compactor to lay block paving?
Yes, both for the sub-base and for bedding the blocks. For finished blocks, use a paving pad on the plate or a dedicated paving roller such as the Weber MT VPR 450.
Does block paving need planning permission?
Not if it’s permeable or drains to a lawn or border. A traditional impermeable surface over five square metres in a front garden that drains to the road does in England. A dropped kerb needs separate consent.
How long does it take to lay a block paved drive?
A two-car drive of around 40 square metres is often a week to ten days for a capable DIYer with the right kit, depending on access, ground and weather.
Hire your block paving kit
Now you know how to lay block paving, tell us the area, your postcode, dates and access and we’ll suggest the right digger, plate, roller and mixer. WhatsApp or call 07841 036064 (Mon to Fri, 7:30am to 5:30pm), or use our contact page for a written quote.