An MOT type 1 sub base is the compacted layer of crushed stone that sits under a drive, patio, path or shed base and carries the load. Get it right and the surface on top stays flat for years. Get it wrong and you’ll see sinking, rocking slabs and ruts within a winter. This guide explains what Type 1 is, how deep to lay it, how much to order, and how to dig out, lay and compact it properly with the right hire kit.

In this guide
It is written for homeowners, landscapers and builders across Devon and Cornwall, where wet winters and clay ground make a well-built sub-base more important, not less.
What MOT Type 1 actually is
“MOT” comes from the old Ministry of Transport, and Type 1 is a sub-base material defined in the Specification for Highway Works (clause 803). In plain terms it is crushed rock, concrete or other hard aggregate graded from about 31.5mm down to dust.
That range of sizes is the point. The large pieces lock together, and the fines fill the gaps between them. When you compact it at the right moisture, you get a dense, stable layer that spreads the load from the surface down into the ground.
Quarries sell both virgin Type 1, made from freshly crushed rock such as limestone or granite, and recycled Type 1 made from crushed concrete and hardcore. Both can perform well if they genuinely meet the grading. Ask your supplier whether their product is certified to the specification or is a “Type 1 equivalent”.
Type 1, Type 3, scalpings and 6F2 compared
Merchants sell several materials that look similar in a bag. They behave quite differently once laid, so it pays to know which one you’re getting.
| Material | What it is | Drainage | Typical use |
|---|---|---|---|
| MOT Type 1 | Crushed aggregate, about 31.5mm down to dust | Compacts tight, water runs off rather than through | Drives, patios, paths, shed and garage bases |
| Type 3 | Open-graded crushed aggregate with few fines | Free draining, water passes through | Permeable paving and SuDS sub-bases |
| Scalpings | Quarry by-product, variable mix of stone and fines | Varies by source | Farm tracks, temporary haul roads, rough bases |
| 6F2 | Coarser capping material, often recycled | Varies | Capping over weak ground, haul roads, bulk fill under Type 1 |
For most domestic drives and patios, Type 1 is the default. If you want a permeable driveway, a Type 3 sub-base under permeable block paving lets rainwater soak away. That can matter for planning: on a house in England, a new front garden surface over 5 square metres normally needs permission unless it is permeable or drains to a permeable area. The Planning Portal guidance on paving front gardens explains the rule.
6F2 and scalpings are cheaper and useful in the right place, but they are not a direct swap for Type 1 under a finished drive.
How deep should an MOT type 1 sub base be?
Depth depends on what will sit on it and how good the ground is underneath. The figures below are common starting points for compacted thickness on reasonable ground. Soft clay, made ground or wet sites need more.
| Project | Compacted Type 1 depth | Notes |
|---|---|---|
| Garden path (foot traffic) | 75–100mm | One well-compacted layer is often enough |
| Patio | 100–150mm | Plus bedding layer for slabs |
| Shed or summerhouse base | 100–150mm | More for a concrete slab or heavy timber building |
| Car driveway | 150–200mm | Lay in two lifts |
| Van, trailer or heavier vehicle use | 200mm and up | Consider geotextile and a capping layer on weak ground |
Then add the thickness of your bedding and surface to work out total dig depth. A block-paved drive with 150mm of Type 1, around 40mm of sharp sand bedding and 50mm blocks needs a dig of about 240mm below finished level. A manufacturer’s laying guide for your chosen paving will give their recommended build-up, so follow that where it differs.
How much MOT type 1 do I need?
Work it out in cubic metres, then convert to tonnes, because that’s how merchants sell it. The formula is length × width × compacted depth, all in metres.
Worked example: a single car drive
This is an illustrative calculation. Take a drive 6m long and 3m wide with a 150mm (0.15m) compacted sub-base.
- Volume: 6 × 3 × 0.15 = 2.7 cubic metres.
- Weight: compacted Type 1 is often taken as roughly 2 tonnes per cubic metre, so 2.7 × 2 = about 5.4 tonnes.
- Allowance: add around 10% for uneven formation, edges and levelling. That gives roughly 6 tonnes.
Worked example: a patio
A 4m × 3.5m patio with 100mm of Type 1 is 4 × 3.5 × 0.1 = 1.4 cubic metres, or about 2.8 tonnes. With an allowance, order around 3 to 3.2 tonnes.
Density varies with the rock type and whether it is recycled, so ask your supplier for their figure. Loose Type 1 also compacts down, so a layer spread at 120mm may finish nearer 100mm. Order slightly over rather than run short halfway through a lift.
Hire kit for laying an MOT type 1 sub base
The right machines turn a back-breaking job into a straightforward one. A typical kit list from our construction hire range:
- Mini digger: Sunward SWE 08B for tight gardens, SWE 18UF or SWE 25UF for drives with reasonable access. Read more about the SWE 08B for small projects.
- Dumper or carrier: Hyundai 500kg tracked or Mechbadger tracked dumper for gardens and soft ground, HG 1000 electric wheeled dumper for firm, paved routes, or the Tracspider tracked carrier for lawns and slopes.
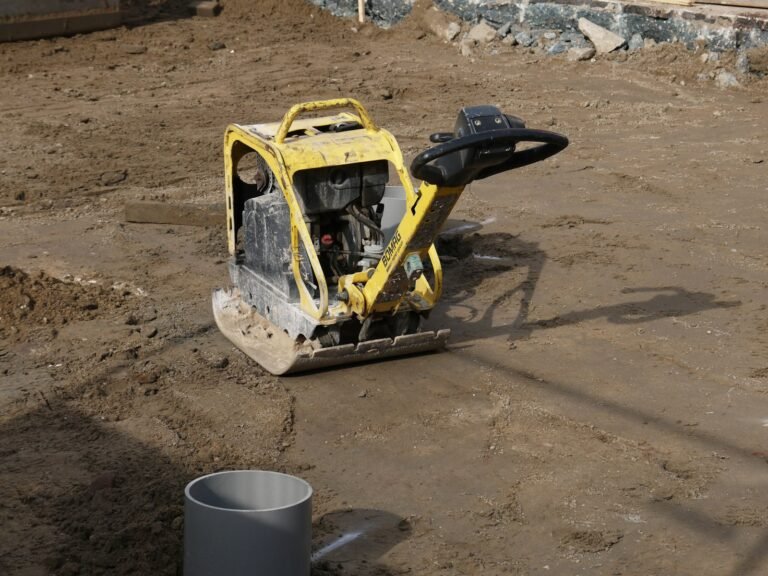
- Compactor: a Weber MT forward or reversible plate, chosen by area and layer thickness (see below).
- Rammer: Weber SRV 620-II or SRV 300-II SF for trenches and edges where a plate won’t fit.
- Dragon LT1000 dumpy bag lifter: useful if your Type 1 arrives in bulk bags.
- Hand tools: rake, shovel, string lines, pegs, spirit level and a long straightedge. Ask us what’s available on our hand tools page.
Step by step: digging out and preparing the formation
The “formation” is the ground you dig down to. Its quality decides how well the Type 1 performs, so take time over this stage.
- Check for services. Drives and paths often run over water pipes, cables and drains. Use LinesearchbeforeUdig, utility plans and a cable avoidance tool, and hand dig near anything you’ve located.
- Mark out and set levels. Peg out the area and set string lines for finished level, including falls for drainage. A fall of around 1 in 60 to 1 in 80 away from the house is common for patios, but follow the paving manufacturer’s guidance.
- Strip topsoil and organic material. Remove all turf, roots and topsoil. Organic material rots and settles.
- Dig to formation depth. Use the digger with a grading bucket for a cleaner bottom, and keep checking depth against your string lines.
- Deal with soft spots. Dig out any soft pockets and backfill with compacted Type 1 or 6F2.
- Compact the formation. Run the plate over the dug surface before you lay anything. On wet clay, don’t overwork it, as it can turn to slurry.
Geotextile membrane
On clay, silt or soft ground, lay a geotextile separation membrane on the formation before the Type 1. It stops the stone being pressed into the soil and the fines being pumped up into the stone. Overlap joints generously, and run it up the sides where you can.
On good, firm ground a membrane is less critical, but many installers use it as standard because it costs little compared with redoing a drive.
Laying and compacting in lifts
Compacting Type 1 in one deep layer is the most common reason sub-bases fail. A plate compactor‘s effect drops off with depth, so the bottom of a thick layer stays loose.
- Spread the first lift. Lay Type 1 loose to about 100–125mm, so it compacts to roughly 75–100mm. Rake it level.
- Check moisture. It should be damp, not dry and dusty, and not wet and pumping. If it’s dry, lightly spray it. If it’s waterlogged, let it drain.
- Compact. Run the plate over the whole area in overlapping passes, working from the edges in. Four to six passes per lift is a common starting point, then check.
- Check the surface. It should be firm, tight and hardly mark underfoot. Fill low spots, re-rake and compact again.
- Repeat. Lay and compact the next lift the same way until you reach the finished sub-base level.
- Finish to level. Use a straightedge and string lines to check the final surface is within tolerance before the bedding layer goes on.
Edges matter. Plates struggle tight against walls, kerbs and edging, so use a rammer there. Weak edges let blocks and slabs creep out over time.
Choosing the right Weber compactor
Match the machine to the area and the depth of each lift. A plate that is too light for a drive wastes time and leaves soft layers. One that’s too heavy for a narrow path is hard to handle.
| Machine | Type | Good for |
|---|---|---|
| Weber MT CF 1-III Hd | Light forward plate | Paths, small patios, shed bases, bedding sand |
| Weber MT CF 2-II Hd | Mid-range forward plate | Patios and driveway work |
| Weber MT CF 3-II Hd | Heavy duty forward plate | Sub-base compaction on drives |
| Weber MT CR 2 / CR 3-III | Reversible plates | Thicker lifts, confined areas, utility reinstatement |
| Weber MT CR 7 | Large reversible plate | Large areas, yards, commercial sub-bases |
| Weber MT SRV 620-II / SRV 300-II SF | Rammers | Edges, trenches, around manholes |
| Weber MT VPR 450 | Paving roller | Consolidating block paving once laid |
Reversible plates can work forwards and backwards without turning, which helps in confined drives and between walls. For block paving, the VPR 450 roller consolidates the blocks into the bedding sand after laying. It is a finishing tool for the paving rather than a substitute for compacting the Type 1 itself.
Plate compactors vibrate, so limit the time each person spends operating one and take regular breaks. HSE’s hand-arm vibration guidance explains employer duties.
Moving Type 1 around the site
Type 1 is heavy. Barrowing six tonnes up a side passage is a long, hard day. Plan how you’ll move it from where the lorry tips to where it’s needed.
- Tip location: ask the merchant to tip on a sheet or board near the work, clear of drains and off the highway unless you have permission.
- Load with the digger: the mini digger can load dumpers straight from the pile.
- Route: board soft lawns and protect paving. Keep the route clear of people.
- Bulk bags: a dumpy bag lifter lets you place bags close to the work rather than splitting them on the drive.
A tracked dumper copes with soft ground and slopes. The HG 1000 electric dumper is quiet and has no fumes, which helps in residential streets and enclosed spaces.
Wet weather and South West ground
Devon and Cornwall get plenty of rain, and much of the region has clay-rich or shaley ground that holds water. That affects every stage of building a sub-base.
- Avoid digging out the formation and then leaving it open for days in wet weather. Lay and compact Type 1 over it as soon as you can.
- Don’t compact Type 1 that is saturated. It won’t densify and can pump fines out.
- Consider a thicker sub-base and a geotextile on clay ground.
- Think about where surface water will go. Falls, channel drains and soakaways may be needed.
- Keep stockpiles covered if heavy rain is forecast.
Spring and early autumn are often the best windows, but plenty of good drives are laid in winter with a little planning.
Checking the sub-base before you pave
Before the bedding layer goes on, give the finished MOT type 1 sub base a proper inspection. Problems are cheap to fix now and expensive once blocks or slabs are down.
- Firmness: walk the whole area. Your heel shouldn’t leave a mark, and the plate shouldn’t bounce or sink in any spot.
- Level and falls: run a straightedge in several directions and check against your string lines. Look for dips that would hold water.
- Thickness: dig a small inspection hole at a couple of points to confirm the compacted depth, then refill and re-compact it.
- Edges: make sure edging, kerbs or haunching are in and the stone is tight against them.
- Surface texture: a closed, tight surface is right. Loose stones on top mean another pass or a little more fines.
If you find a soft area, dig it out, find the cause and rebuild it in lifts. Usually it’s a pocket of topsoil, a wet patch or a spot the plate missed.
Glossary of sub-base terms
- Formation: the dug ground surface the sub-base sits on.
- Sub-grade: the natural ground beneath the formation.
- Capping: an extra layer, such as 6F2, used over weak ground below the sub-base.
- Lift: one layer of material laid and compacted before the next goes on.
- Grading: the mix of particle sizes in an aggregate.
- Bedding layer: the sand or mortar layer the paving is set into.
- Surcharge: the extra loose depth you lay to allow for compaction.
- Optimum moisture: the dampness at which an MOT type 1 sub base compacts most densely.
Common mistakes with an MOT type 1 sub base
- Laying it too thin to save on stone.
- Compacting one deep layer instead of building it in lifts.
- Leaving topsoil, turf or roots under the sub-base.
- Using scalpings or 6F2 as a cheaper swap under a finished drive.
- Compacting it bone dry or soaking wet.
- Using a plate that’s too light for the area and the thickness.
- Ignoring falls, so water ponds on the surface or runs towards the house.
- Weak edges, where blocks and slabs later spread.
Hire periods for a sub-base job
Most domestic MOT type 1 sub base jobs suit a short hire. A patio dig-out and compaction might be done in a couple of days. A full driveway often takes most of a week with digger, dumper and plate together.
Landscapers and builders doing this every week may find Flex Hire better value. It’s one flat monthly fee with swaps any time. Tier 1, covering compact kit and everyday tools, is £795 +VAT & delivery per month, and Tier 2 adds excavators and crushers at £895. Servicing, collection and redelivery are included.
Hire is self-drive unless agreed otherwise, and insurance isn’t included automatically, so arrange cover before the kit arrives.
Frequently asked questions
How much MOT type 1 do I need for a drive?
Multiply length × width × compacted depth in metres to get cubic metres, then multiply by roughly 2 to get tonnes. A 6m × 3m drive at 150mm is about 5.4 tonnes before allowance.
Can I use a plate compactor on Type 1 in one go?
Only for thin layers. For anything over about 100mm compacted, lay and compact in lifts so the whole depth is dense.
Do I need a membrane under Type 1?
It’s strongly recommended on clay, silt and soft ground. It keeps the stone and soil separate so the sub-base doesn’t sink.
Is recycled Type 1 as good as virgin?
It can be, if it meets the grading and is clean of wood, plastic and soil. Ask your supplier for details of how it is produced and tested.
How long does Type 1 take to settle?
Properly compacted Type 1 doesn’t need time to settle. You can lay the bedding and surface straight after compaction.
Which plate should I hire for a driveway?
A heavier forward plate such as the CF 3-II Hd or a reversible plate such as the CR 3-III suits most domestic drives. WhatsApp us the area and depth and we’ll advise.
Hire the kit for your sub-base
Send us the job, site postcode, dates and access details on WhatsApp or call 07841 036064, Monday to Friday, 7:30am to 5:30pm. We’ll recommend the right digger, dumper and compactor and deliver from our depot near Okehampton. For written quotes, use our contact page.