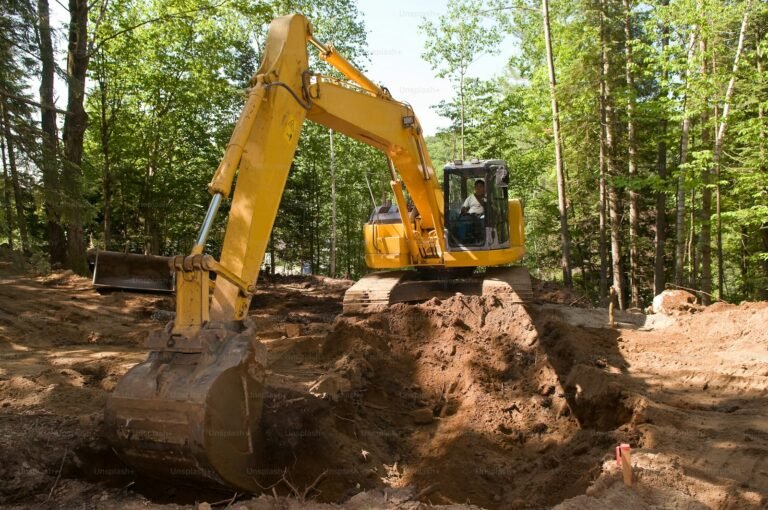
If you are hiring a mini digger for the first time, knowing how to use a mini digger safely comes down to three things: checking the machine before you start, understanding which control pattern it is set to, and working slowly and deliberately until the movements become second nature. This guide walks through the walk-round checks, the controls, basic digging technique, loading a dumper, working on slopes and near services, and how to finish the day.

In this guide
It uses our Sunward SWE 08B and SWE 18UF as examples. Please treat it as background reading, not a substitute for proper training. If you will be operating a digger at work, or on any job where other people could be hurt, get trained first.
Training first: what this guide can and cannot do
There is no single legal licence needed to drive a mini digger on private land, but the law requires anyone using work equipment to have adequate training, and employers must make sure their operators are competent. The HSE guidance on training and competence explains the duties. On most commercial sites you will also be asked for a recognised operator card, typically through CPCS or NPORS.
A short practical course with a reputable provider teaches you far more than any article, because an instructor can watch you work and correct bad habits before they set in. If you are a homeowner digging your own garden, we still strongly recommend some hands-on instruction, and our team will run through the machine with you on handover. Our hire FAQ covers what we expect from hirers, and hire is self-drive, so the operator must be suitably trained or experienced.
Pre-use walk-round checks
Do a walk-round check at the start of every day, before you start the engine. It takes five minutes and catches most problems before they become breakdowns or accidents.
- Look around the machine. Check for leaks under it, damage to the bodywork, cracked glass or a damaged protective structure.
- Tracks. Look for cuts, missing pads and correct tension. A slack track can come off on a turn.
- Hydraulic hoses and rams. Look for wet patches, chafing, bulges or leaks along the boom, dipper and blade.
- Pins and bushes. Check the bucket pins and any quick hitch locking pin are in place and secured.
- Fluid levels. Check engine oil, coolant, hydraulic oil and fuel, using the sight glasses and dipsticks shown in the operator manual.
- Bucket and teeth. Check teeth are present and secure and the bucket is the right one for the job.
- Seat belt, mirrors and controls. Make sure the seat belt works, the controls are undamaged and the hydraulic isolation lever operates.
- Warning devices. Check the horn, lights and any travel alarm work.
If you find a fault, do not use the machine. Call or WhatsApp us and we will assess it and arrange repair or replacement as quickly as we can.
Getting on, belting up and starting
Use the grab handles and steps, and keep three points of contact as you climb on. Never use the control levers as handholds, because you could move the machine if the hydraulics are live.
Adjust the seat so you can reach the controls comfortably and fasten the seat belt every time. The protective structure on a mini digger is designed to keep you inside it if the machine tips, and it can only do that if you are belted in. Jumping clear of an overturning machine is how people get crushed.
Most mini diggers have a hydraulic isolation lever, often a lever or lift-up console beside the seat. With it raised or locked, the joysticks do nothing. Start the engine with the hydraulics isolated, let it warm up for a few minutes, check the gauges and warning lights, then lower the lever to activate the controls when you are ready.
ISO and SAE control patterns
This is the single most important thing to check before you move the boom. Excavators use two common joystick patterns, and the same hand movement does different things in each. If you have learned on one and sit in a machine set to the other, your first movement can be the opposite of what you expect.
| Joystick movement | ISO pattern | SAE pattern |
|---|---|---|
| Left stick forward and back | Dipper arm out and in | Boom down and up |
| Left stick left and right | Swing left and right | Swing left and right |
| Right stick forward and back | Boom down and up | Dipper arm out and in |
| Right stick left and right | Bucket curl in and out | Bucket curl in and out |
ISO is the most common pattern on machines in the UK, but never assume. Some machines have a pattern change switch or valve, and a previous operator may have changed it. Ask us on handover which pattern the machine is set to, look for the pattern decal in the cab, and test each lever gently with the bucket in a clear space before you start work.
The controls explained
Joysticks
The two joysticks control the boom, dipper, bucket and swing. They are proportional, so small movements give slow, controlled motion. Feather them rather than pushing them to the stops, especially while you are learning.
Travel levers or pedals
Each track has its own lever or pedal. Push both forward to go forward, pull both back to reverse, and move one more than the other to turn. Pushing one forward and the other back spins the machine on the spot, which is useful but tears up lawns. Check which way the blade is facing before you travel. If the blade is behind you, forward and back on the levers are reversed relative to where you are looking.
Dozer blade
The blade is controlled by a small lever beside the seat. Use it for backfilling and levelling, and lower it to the ground while digging to make the machine more stable.
Boom swing or offset
Many mini diggers can offset the boom left or right, usually with a foot pedal or switch. This lets you dig alongside a wall or fence while keeping the tracks parallel to it. It is ideal for trenching close to a boundary.
Auxiliary hydraulics
The auxiliary circuit powers attachments such as breakers or augers. Only use it with an attachment that is fitted and matched to the machine. If you need an attachment, ask us what is available.
Throttle and speed
A throttle dial or lever sets engine speed. Many machines also have a high and low travel speed. Use low speed on slopes, rough ground and in tight spaces.
How to use a mini digger to dig efficiently
Good digging is about smooth, combined movements rather than speed. Once you have the basics of how to use a mini digger, practise in an open area until you can fill and empty the bucket without jerking the machine.
- Position the machine on firm, level ground, square to the dig, with the blade down on the side facing the hole.
- Extend the dipper and lower the boom so the bucket teeth meet the ground at a slight angle.
- Pull the dipper in while curling the bucket, letting the teeth slice into the soil rather than forcing the bucket straight down.
- Raise the boom slightly as the bucket fills, so you take a shallow, even cut rather than a deep scoop that stalls the machine.
- Curl the bucket fully to hold the load, raise it clear and swing to the spoil heap or dumper.
- Dump the load by uncurling the bucket and extending the dipper, then swing back and repeat.
Tips that make a difference
- Keep the cab level. Digging with the machine tilted makes it less stable and makes level trench bottoms harder to achieve.
- Use the blade for stability. Lowering it braces the machine and stops it rocking or creeping towards the dig.
- Dig over the front, not the side. A mini digger is most stable over the blade or over the rear of the tracks. Digging over the side with a heavy load is where tipping starts.
- Place spoil well back from the edge. Spoil heaped at the edge of a trench adds load and can trigger a collapse.
- Grade with the back of the bucket. Light passes with the bucket held flat give a neater trench bottom than trying to dig to level.
A 0.8 tonne machine like the Sunward SWE 08B is light and responsive but easily pushed around by heavy loads, so take smaller bites. A 1.8 tonne zero tail swing machine like the Sunward SWE 18UF is more stable and digs faster, and its zero tail swing means the back of the machine stays within the tracks as it slews, which helps beside walls.
Loading a dumper
Loading a dumper well saves a lot of time and keeps everyone safe.
- Agree positions and signals with the dumper driver before you start.
- Have the dumper parked on level ground, with the engine at idle and the driver either clear of the skip or protected.
- Never swing a loaded bucket over the dumper driver or anyone else.
- Lower the bucket close to the skip before dumping, rather than dropping material from height.
- Spread the load evenly and do not overfill. A heaped skip spills on the move and can make the dumper unstable.
- Know the dumper’s payload. Our Hyundai 500kg tracked dumper and HG 1000 electric wheeled dumper carry very different loads, and wet clay is heavier than it looks.
Tracking and working on slopes
Most mini digger overturns happen on slopes, or when travelling with the boom raised. Follow a few simple rules.
- Travel straight up and down slopes, never across them.
- Keep the bucket low, about 200 to 300mm off the ground, while travelling, to keep the centre of gravity down.
- Use low travel speed and avoid sudden stops or turns.
- On steep ground, travel with the boom facing uphill.
- Avoid soft verges, recently backfilled trenches and wet clay, which can give way under one track.
- If the machine starts to tip, stay in the seat with the belt fastened and lower the bucket to the ground.
Many Devon and Cornish gardens slope steeply, and lawns become slippery after rain. If in doubt, walk the route first and lay ground protection boards where the tracks will run.
Working near underground and overhead services
Striking a buried cable or gas pipe is one of the most serious risks of using a mini digger. Before you dig, find out what is in the ground.
- Get service plans. Use a LinesearchbeforeUdig enquiry and contact the relevant utility companies for plans covering your site.
- Scan the area with a CAT and Genny. A cable avoidance tool detects buried cables and metallic pipes, and the signal generator helps trace them. Only trained people should use them, and they will not find everything, such as some plastic pipes.
- Mark the services on the ground with paint or pegs.
- Hand dig trial holes to confirm the exact position and depth before using the machine nearby.
- Dig with care near marked services, and stop if you find something unexpected.
The HSE publication HSG47, Avoiding danger from underground services sets out the full safe system of work. Look up too: overhead power lines are a serious hazard when raising the boom, especially on farms and in rural gardens.
Working near edges and excavations
Trench sides can collapse without warning, even in ground that looks firm. A cubic metre of soil weighs more than a tonne.
- Never go into an unsupported trench that is deep enough to bury or trap you.
- Keep the machine, spoil and materials back from the edge so they do not overload the sides.
- Fit edge protection or barriers where people could fall in, and fence off open excavations overnight.
- Inspect trenches before each shift and after heavy rain.
The HSE excavations guidance covers support systems, inspection and safe access in more detail.
Refuelling and the end of the day
Refuel with the engine off and cooled, away from drains, ditches and watercourses. Use a funnel or proper fuel can, clean up spills straight away, and never smoke near fuel. Diesel spills into a stream or drain are a pollution incident, so take extra care on farms and near streams.
At the end of each day:
- Park on firm, level ground away from trenches and slopes.
- Lower the bucket and blade to the ground.
- Raise the hydraulic isolation lever, let the engine idle briefly, then switch off.
- Remove the key and keep it secure.
- Clean mud from the tracks and check for damage or leaks.
- Fence off any open excavation and make the site safe for the night.
A practice routine for your first hour
The quickest way to learn how to use a mini digger is a structured warm-up in a clear, level area before you go near the real job. Work through these exercises in order, at low engine speed.
- Single movements. Move each function on its own: boom up and down, dipper in and out, bucket curl, swing left and right. Notice how little lever movement each one needs.
- Two movements together. Combine boom and dipper, then dipper and bucket, until the bucket travels in a smooth arc.
- Dig and dump. Dig a shallow practice hole and place the spoil on a marked spot, aiming for the same place each time.
- Travel and turn. Drive forward and back with the blade in front, then behind, and make gentle turns round a cone.
- Backfill and level. Use the blade to push the spoil back and level the patch.
Only move on to the real job once these feel controlled. If you are working in a garden, a practice patch where the new lawn or patio will go anyway is ideal.
Common beginner mistakes
- Not checking the control pattern before moving the boom.
- Forgetting which way the blade faces, so the tracks go the wrong way.
- Jerky, full-lever movements that rock the machine and wear out the operator.
- Swinging over the side with a heavy bucket on uneven ground.
- Spinning on lawns, which rips up turf. Make gentle, wide turns instead.
- Digging before checking for services.
- Leaving the seat belt off for quick jobs.
Learning how to use a mini digger is mostly about patience. Spend the first hour practising in a clear area and the rest of the hire will go far better.
Frequently asked questions
How long does it take to learn how to use a mini digger?
Most people can make basic, controlled movements within an hour or two of practice, but working efficiently and safely near hazards takes much longer. A short training course is the quickest way to build good habits.
Is a smaller digger easier for a beginner?
A smaller machine is easier to get into gardens and less intimidating, but it is also easier to overload and tip. A 1.8 tonne zero tail swing machine is often more stable for a beginner where access allows.
Can I change the control pattern myself?
Some machines have a pattern change switch or valve. Ask us on handover rather than changing it yourself, and always test the controls gently after any change.
What should I do if I hit a cable or pipe?
Stop work, keep people away and do not touch damaged cables. If gas is leaking, move everyone away and call the gas emergency number. Report damage to the utility owner and follow their instructions.
Can I use the digger in the rain?
Light rain is usually fine, but wet clay and grass make the machine slide and trench sides less stable. In heavy rain, stop and let the ground recover rather than risk a slip or collapse.
Will you show me how the machine works?
Yes. On delivery we will show you how to use a mini digger of that model, running through the controls, checks and any machine-specific features. That handover does not replace formal training, but it helps you get started safely.
Hire a mini digger from 4Counties
Our Sunward excavators range from the 0.8 tonne SWE 08B to the 9 tonne SWE 90UF, all listed on our construction hire page. To book, WhatsApp or call 07841 036064 (Monday to Friday, 7:30am to 5:30pm) with the machine, site postcode, dates and access details, or send an enquiry through our contact page.